The Complete Guide for Home Studios Acoustic Treatment
One of the most important aspects of your music studio is acoustic treatment. An untreated environment will influence the sound generated by your speakers in a variety of ways, resulting in poor mixing and mastering decisions. As a result, the balanced mixes you hear on your speakers will not necessarily be observed when your audio is played on other systems. Pro-acoustic offers the UK’s most comprehensive range of acoustic treatment solutions for your home studio.
Home Studio Acoustic Treatment
The acoustic treatment of a home studio is not easy for beginners, but with Pro-acoustic products and our expertise, we can help you get the most out of your space. This is a guide on how to introduce acoustic treatment in your home studio –
-
Treating First Reflections - Assume you're at your mixing position with no acoustic treatment in your room Facing your mixing desk and listening to music. Sound waves will be traveling around the space, these sound waves will be reflected off the many surfaces in your home. These surfaces include the ceiling, your walls, desk, etc... Sound waves bouncing off these surfaces arrive at your ears with a tiny delay after the sound travels directly from your speaker cones to your ears. Without getting into the science of it, this can result in comb filtering, which isn't ideal. Any significant reflections from your monitor speakers will cause issues with your room's frequency response, causing several dips (areas where sound waves cancel each other out) & peaks (areas where sound waves reinforce each other) across the frequency spectrum.

To solve this issue, you must create a reflection-free zone for your home studio. A reflection-free zone is a region around your listening position where no significant early reflections are present. Acoustic treatment panels strategically positioned will help with this. Using a mirror, you can easily determine where you should set your acoustic treatment panels. Get someone to help you to hold it on the surfaces where you believe there could be reflections, and then check to see whether you can see your monitor speakers. Failing that placing panels mid-way between your speaker grills and your ears will usually suffice.
- Rear Wall Acoustic Treatment - Diffusion on the back wall was formerly common in professional recording studios, but has been quite expensive to do so; in general, diffusive panels are expensive to build and manufacture. Our diffuser flex diffuser panels use a specifically generated slot pattern creating effective diffusion in your room without the expense of traditional diffusers. However, if cost is an issue then having r uneven surfaces that scatter sound waves in all directions, dispersing standing waves and resonance frequencies will help. Diffusers are specialized acoustic components for this purpose. Diffusers are often composed of wood or other sound-absorbing materials that have been molded into an uneven surface. You could create your own diffuser panels if you can't afford factory-made ones, but this can be tricky. Another option is to use various methods to produce uneven surfaces.
You might, for example, position a bookshelf against the back wall of your home studio if you have a bunch of books. Ensure to stack your books in a random manner to create an uneven surface. These alternatives may not be as technically advanced as specialist diffuser panels, but they are nearly always preferable to bare walls.
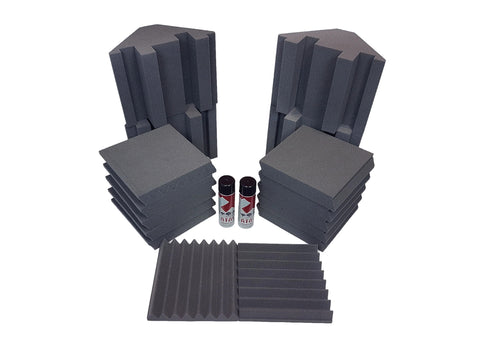
- Bass Treatment – An important part of acoustic room treatment is bass treatment. Bass traps which are placed in the corners of a recording room are the simplest technique to handle bass resonances since this is where the bass energy builds up when two large surfaces meet. So, in corners you'll have three separate surfaces meeting at the two walls and the ceiling, resulting in a large bass build-up. installing bass traps in the corners of a room will help to absorb the low-end energy of your bass modes, resulting in a flatter frequency response. Our corner kits are designed to maximize the amount of absorption in and near the wall however if you are treating your corners you want to ensure you have large absorption components at and around the corners of your room.
Basic acoustic treatment isn't difficult, and the advantages outweigh the initial expense. Many studio owners will spend thousands on the latest music equipment and instruments forgetting the biggest instrument coloring their sound, their recording space, don’t be one of them. We hope this article gives you a good idea of what you can do to deliver commercial-sounding audio content in your home studio.

